How to deploy Azure Cloud Services using Octopus Deploy
I am developing an ASP.NET MVC application which consists of two Azure Cloud Services, web role and worker role (two different solutions).
The Continuous Integration part is handled with JetBrains TeamCity and Octopus Deploy. Those are some pretty neat tools but not so well documented in terms of Azure Cloud Service deployment.
TeamCity to Octopus
- Install OctoPack NuGet to your WebRole/WorkerRole project. TeamCity has an option to automatically create OctoPacks of projects that have the OctoPack NuGet installed. Make sure you turn that on.
PM > Install-Package OctoPack
- Create a .nuspec file to your WebRole/WebWorker project. A .nuspec file is a manifest that uses XML to describe your package. The idea is to copy your service definition and configuration files to the root of your solution for later use in Octopus Deploy.
<?xml version="1.0"?>
<package xmlns="http://schemas.microsoft.com/packaging/2011/08/nuspec.xsd">
  <metadata>
    <version>0.00</version>
    <authors>Your Authors</authors>
    <owners>Your Company</owners>
    <id>Your.ProjectId</id>
    <title>Azure Deployment Package</title>
    <requireLicenseAcceptance>false</requireLicenseAcceptance>
    <description>Azure Cloud Service</description>
    <copyright>Your Company 2014</copyright>
  </metadata>
  <files>
    <!-- Add the files (.cscfg, .csdef) from your Azure CS project to the root of your solution  -->
    <file src="..\YourAzureCloudProjectName\*.*" />
    <!-- Add the files .wadcfg file to the root to get the diagnostics working  -->
    <file src="..\YourAzureCloudProjectName\YourRoleNameContent\*.*" />
  </files>
</package>
- Add the following line to your role's .csproj inside the
<PropertyGroup Condition=" '$(Configuration)|$(Platform)' == 'Release|AnyCPU' "></PropertyGroup>block: (This will copy all the files in your solution to the octopacked nuget file transferred to Octopus Deploy)
<OctoPackEnforceAddingFiles>True</OctoPackEnforceAddingFiles>
- Publish packages to Octopus using TeamCity
Octopus to Azure deployment
Script module
Go to your Script Modules and add a module that contains the following function:
<# ############################ Create CSPKG file ############################ #>
<# PARAMETERS:
1. workingDirectory: Specify the path of the Visual Studio Solution
2. webProjectName: Specify WebRole Project Name in the Visual Studio Solution
3. cloudProjectName: Specify Cloud Service Project name of the Visual Studio Solution
4. workerRoleAssembly: Specify worker role assembly name (dll) if you wan't to package a worker role cloud service.
#>
Function generatePackage($workingDirectory, $projectName, $cloudProjectName, $workerRoleAssembly)
{
  Write-Host "workingDirectory: " $workingDirectory
  Write-Host "projectName: " $projectName
  Write-Host "cloudProjectName: " $cloudProjectName
  Write-Host "workerRoleAssembly: " $workerRoleAssembly

  # Declaration
  $cspack = 'C:\Program Files\Microsoft SDKs\Azure\.NET SDK\v2.4\bin\cspack.exe'
  $solutionDir = [string]::Format("{0}", $workingDirectory)
  $webDir = $solutionDir
  $packageOutDir = [string]::Format("{0}\{1}\{2}", $solutionDir, $cloudProjectName, "bin\Release\app.publish")
  $rolePropertyFile = [string]::Format("{0}\{1}\{2}", $solutionDir, $cloudProjectName, "roleproperties.txt")

  # Create Role Properties File – This property file specifies the .Net framework against which webrole is going to run.
  New-Item $rolePropertyFile -Type file -Force -Value "TargetFrameWorkVersion=v4.5" | Out-Null
  New-Item $packageOutDir -Type directory -Force | Out-Null

  # CSPack command Definition
  $serviceDefinitionPath = "ServiceDefinition.csdef"
  $serviceConfigurationPath = "ServiceConfiguration.Cloud.cscfg"

  # Check that $workerRoleAssembly ends with '.dll'
  if($workerRoleAssembly.EndsWith(".dll")) {
    Write-Host "Worker Role Assembly provided"
    $serviceRole = [string]::Format("/role:{0};{1};{2}", $projectName, $webDir, $workerRoleAssembly)
  } else {
    $serviceRole = [string]::Format("/role:{0};{1}", $projectName, $webDir)
  }
  $rolePropertiesFile = [string]::Format("/rolePropertiesFile:{0};{1}", $projectName, $rolePropertyFile)
  $sites = [string]::Format("/sites:{0};Web;{1}", $projectName, $webDir)
  $packageOutput = [string]::Format("/out:{0}\{1}.cspkg", $packageOutDir, $cloudProjectName)

  # Build CSPKG file
  & $cspack $serviceDefinitionPath $serviceRole $rolePropertiesFile $sites $packageOutput /useCtpPackageFormat | Out-Null

  # Copy configuration file
  Copy-Item $serviceConfigurationPath $packageOutDir

  # Remove Role Properties File
  Remove-Item -Path $rolePropertyFile -Force | Out-Null
}
The script takes 4 arguments:
- Working directory. You can use
(Get-Item -Path ".\" -Verbose).FullNameto get the current execution path. This works for most of the cases with Azure Cloud Services. - Project name. This is the "role project"'s name.
- Cloud project name. This is the cloud project name in your solution that contains the cscfg and csdef files.
- Worker role assembly [OPTIONAL]. Provide the worker role assembly name (e.g. WorkerRole.dll) if you wan't to package a worker role cloud service. Cspack.exe takes additional parameter for /role if your project is a worker role.
You can enable the script module for your Octopus Project by clicking the "Configure script modules for this project" link in the project page.
Step template
Ok, now you should create a step template (choose "Deploy to Windows Azure" as template) that has a couple of parameters. This is handy if you need to deploy more than one Cloud Service using the same Azure Subscription Id, Storage Account etc. If you need to deploy only one cloud service, don't bother doing a step template but just a normal "Deploy to Azure" step in your process.
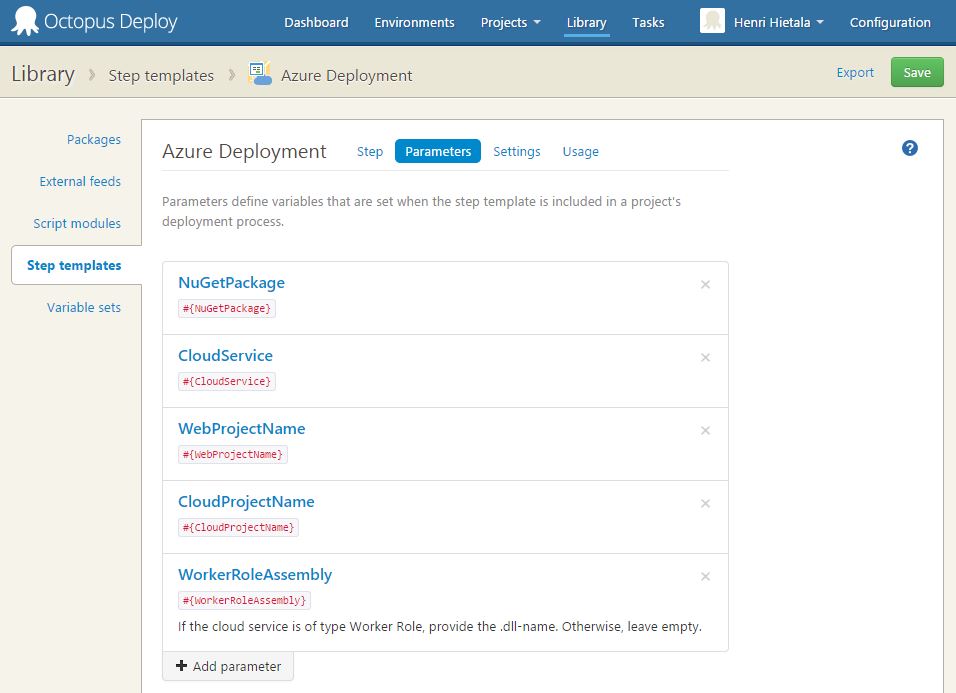
Prefill the step template form inherited from "Deploy to Windows Azure" template with your Azure info.
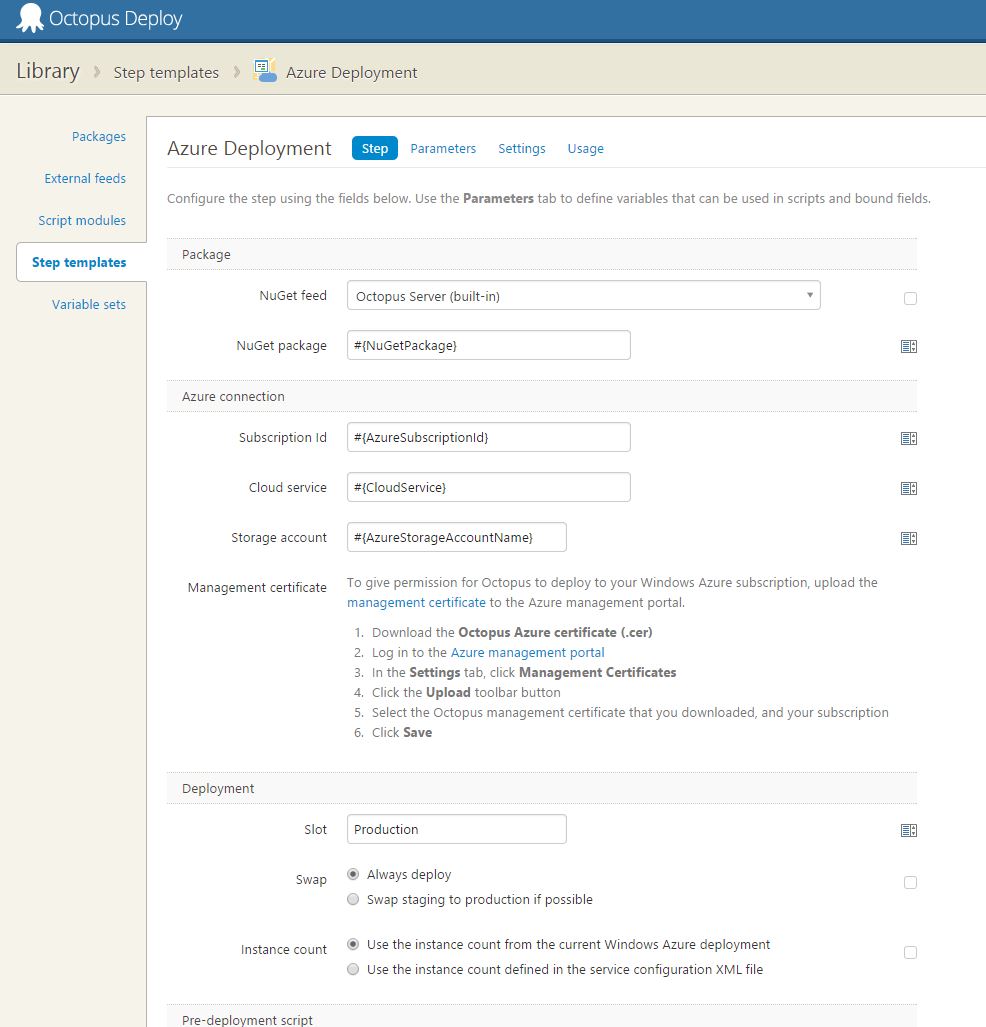
I've filled the form with variables that I have specified in my project's variables.
Then enable "Custom PowerShell scripts" for the template. This will allow you to execute custom PS scripts in three different phases of your deployment process: Pre-Deploy, Deployment, Post-Deploy.
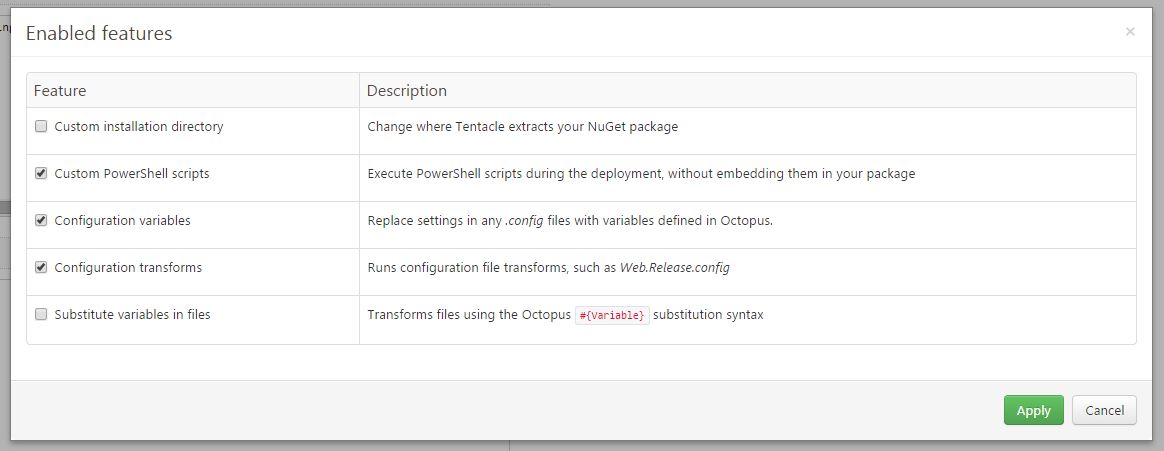
You are interested in executing a custom PowerShell script in Deployment phase. This will be executed after your .config transformations (connectionString, appSettings..). The script you wan't to execute will package your project into a Azure Cloud Service .cspkg package that can be deployed to Azure. Octopus will automatically find the .cspkg file so all you need to worry about is generating it (no matter where).
After you have added and enabled the script module, you can call its functions in your deployment step template. Call the generatePackage function in deployment phase like this:
generatePackage -workingDirectory (Get-Item -Path ".\" -Verbose).FullName -webProjectName "#{WebProjectName}" -cloudProjectName "#{CloudProjectName}" -workerRoleAssembly "#{WorkerRoleAssembly}"
Notice that I'm using argument values as variables. Those variables are actually the step templates parameters.
Enable "Replace appSettings and connectionString entries in any .config files" and "Automatically run configuration transformation files" in step template's settings.
Create the deployment steps
Now you are ready to make use of the step template. Just add a new step in your project process that uses your step template.